Four Ways Not to Texture RoomPlan Objects
Last time I decided to explore building a real-time spatial map of my home. Hopefully I'll get to that "real-time" component at some point, but let's take this one step at a time. First I'll try and get a 3D model of my home.
I have a running list on my phone of 80+ AR ideas, concepts, and products that (at some point) I thought would be interesting to build or explore. The vast majority of the ideas are dumb, impossible, or spur-of-the-moment fancies. There are a small number of ideas I'll keep on the list for years and continuously revisit in my mind; occasionally I'll reconsider whether the tech or my capabilities or my availability have reached a point where sitting down to build that specific idea is feasible. Or close enough to feasible to warrant exploration.
One such idea came about in 2022. My parents were considering knocking down a wall to create a more open floorplan in their home. They went back and forth on wondering how it would change the flow of their home, whether the cost would be "worth it," and whether the new layout would introduce other problems. This seemed like an ideal situation for using augmented reality to view other potentialities for a space...it just took me a year to actually give it a go. In my mind, the "ability to see through walls" is closely related to the "ability to see a volumetric, real-time version of my home," so I now have a couple features to try and build.
The Basic Requirements
There are many excellent 3D scanning, home modeling, and similarly related apps out there. But where's the fun in dowloading something someone else has built up and polished over the course of many years and thousands of learnings and millions of downloads! I'll try and build the version of the product I want.
Luckily, there's a newish native SDK that'll serve as a solid basis: RoomPlan. In my brief survey of today's top App Store apps that use RoomPlan, every single one I found uses the built-in RoomCaptureView. Using that view provides a ton of excellent UX, UI affordances, and impressive polish for free; Apple designed it and you can plop it down into your app in a matter of minutes to legitimize your app and add exciting new functionality.
As much as I'd love to coast off the work done by others, that doesn't help me here: RoomCaptureView presently outputs a 3D model of the scanned room and its contents (e.g. table, chair, sofa, bed) as a collection of bland, colorless boxes. Even though I've spent an inordinate amount of time in my tiny Chicago apartment – when I quickly glanced at a few models exported from RoomPlan in my Downloads folder, I had some difficulty:
- Recognizing which 3D model was of my home vs. some random model exported from RoomPlan sample code
- Orienting myself when looking at the 3D model of my home to understand which part was the kitchen, which the bedroom, which the bathroom, etc.
Take a look yourself:
Between these two I can't instantly recognize the model of my apartment
What I'm seeking is instantaneous recognition of a familiar location based on viewing its model. When I see a map of Chicago, I instantly recognize it because I'm familiar with the contours of the city and Lake Michigan is almost universally colored blue. When I see a picture of my family, I instantly recognize the faces I've seen a million times. When I hear those specific few seconds of "ambient street noise" that start off the track "Da Funk," I know what's coming.
I want to get closer to that level of familiarity when looking at one of my models presented in this app. So perhaps adding some context, color, and texture to the 3D models would help achieve split-second understanding of what a model represents.
Now that I've talked around the "see through walls" and "spatial representation of my home" concepts, let's list out what this project needs to be able to do:
- The app needs to be semantically aware (i.e. understand the difference between a box that represents a wall and a box that represents a table) to facilitate manipulation of the model; so I need to employ methodologies and techniques that yield smarter 3D models with semantic segmentation and/or scene understanding, plain 3D models won't work for me here
- The app needs to produce a 3D model (e.g. a collection of boxes representing different parts of a home) so I can simply delete one box representing a wall to see through it; so methodologies and techniques that yield 3D point clouds, instead of 3D boxes, aren't that interesting to me
- The app needs to be built using Apple's native SDKs and APIs available now, this is a personal preference as I believe there's enough fun stuff to build and explore using today's native libraries – there's no need to introduce additional complexity via third-party integrations; so while they may be all the rage right now, I'm not going to be delving into NeRFs (Neural Radiance Fields, great name) or Gaussian Splats (even better name)
- The app needs to be able to provide color or texture to the 3D model to yield a more familiar representation of a space; so the standard
RoomCaptureViewand its output may provide some help, but I'll likely be exploring my ownRoomCaptureSessionDelegate
The Initial Demo
Some combination of RealityKit, ARKit, RoomPlan, Metal, and buggy code yields this initial demo:
Wallhack
RoomPlan took care of generating a semantically aware model. RoomPlan guesses which parts of a room are a bed, sofa, desk, chair, or something else. To achieve the "seeing through walls" effect, 3D RealityKit models (i.e. simple boxes) were generated and placed in an ARSession by utilizing a custom RoomCaptureSessionDelegate. And ARKit took care of applying some texture to the simple boxes. Textures sampled from the camera make the model a bit more convincing versus representing furniture with differently-sized gray boxes.
There are still many problems I need to work out in the demo; it was also anything but a straightforward path just to get this far. I went down multiple dead ends, specifically when trying to capture images to use as textures for the boxes.
Four Texturing Failures
To texture the boxes I place using RoomPlan + RealityKit, I use perhaps the most straightforward option: ARKit uses the portion of the camera image corresponding to a box side and then "paints" the box upon tapping the screen.
But I'd love to save someone else some time by walking through the other methods I tried. I'm under no pretense that these options couldn't work or that they might be superior to my simplistic, lo-fi painted, six-sided prisms – but while researching and prototyping I abandoned these techniques for various reasons.
Metal Surfaces
About once a year I think to myself: I should really learn more about Metal. So I try. And then my brain melts. I've shipped multiple products over the years that utilize Metal in various (typically limited) capacities. But I still don't fully understand the Metal pipeline and how to build something solely on Metal.
Not much to say here, except: I looked at some sample projects that write images and textures to Metal surfaces, my brain refused to understand what was going on, and then shortly thereafter I moved on.
Object Capture
In 2023 Apple expanded their photogrammetry API Object Capture to be usable on iOS 17. So I launched the Object Capture sample app, I took over a hundred pictures of my bed from many angles, my iPhone 15 Pro got red hot, and Object Capture then took a few minutes to produce a USDZ file of my very messy bed.
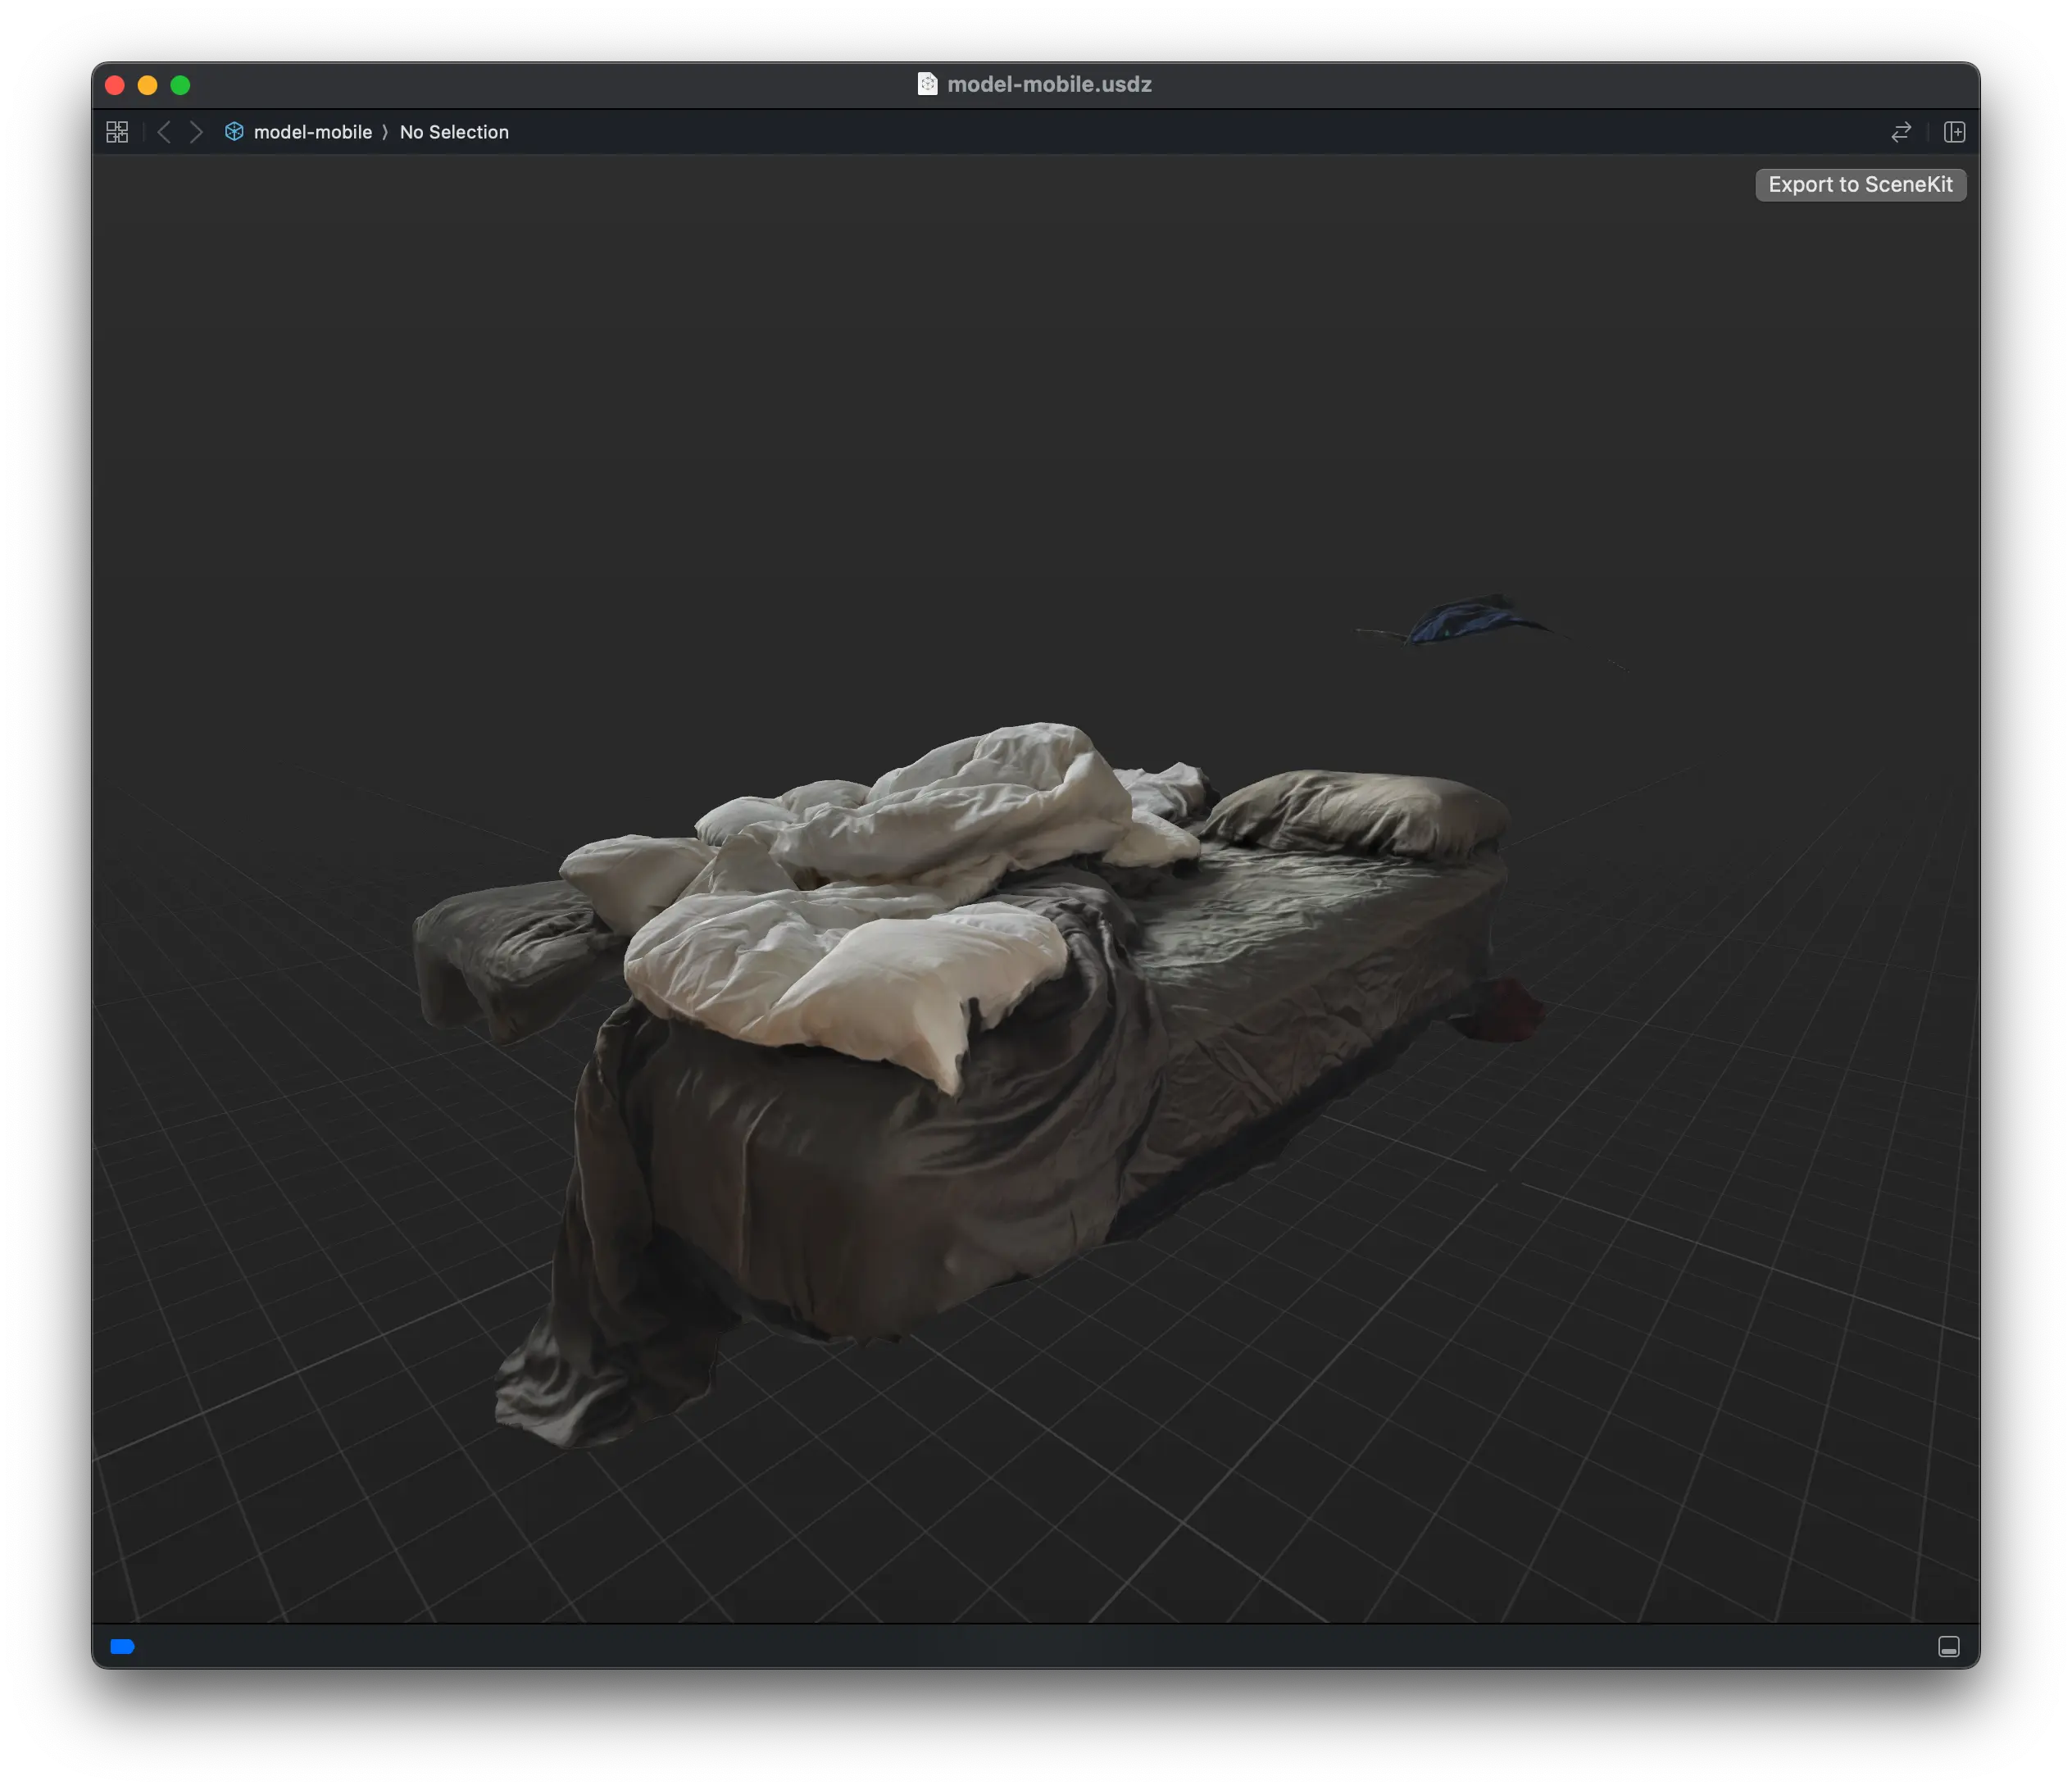
How embarrassing
Admittedly, I did not capture the bed in ideal conditions. But there are several issues immediately apparent:
- The process took over a hundred pictures of a single object as input
- The process took several minutes to create the model for a single object
- The capture "missed" entire portions of the object like the headboard and several sizable chunks of the bed
- The resultant model, while very detailed, is shaped irregularly – which may lead to UX, processing, and placement issues down the road
With some fiddling, the models output by Object Capture would likely, by far, be the most vivid and visually impressive. But I am interested in someone creating a cute, little replica of their home in a matter of minutes. Not hours. The conditions, patience, and time I'd be asking of my app's users to take thousands of pictures to create impressive, yet imperfect, models of their furniture is absolutely unrealistic.
Object Capture is extremely compelling and has thousands of use-cases; but this isn't one of them.
RealityKit Shaders
Eventually, I want to learn all about shaders. I'm fascinated by the shader scene and Shadertoy. There are some true magicians working on shaders. I assume such knowledge would be helpful, and will become more familiar, as I delve into Reality Composer Pro's Shader Graph in the coming months.
So I thought this project may be an appropriate time to give RealityKit's Custom Materials, and their corresponding shaders, another look.
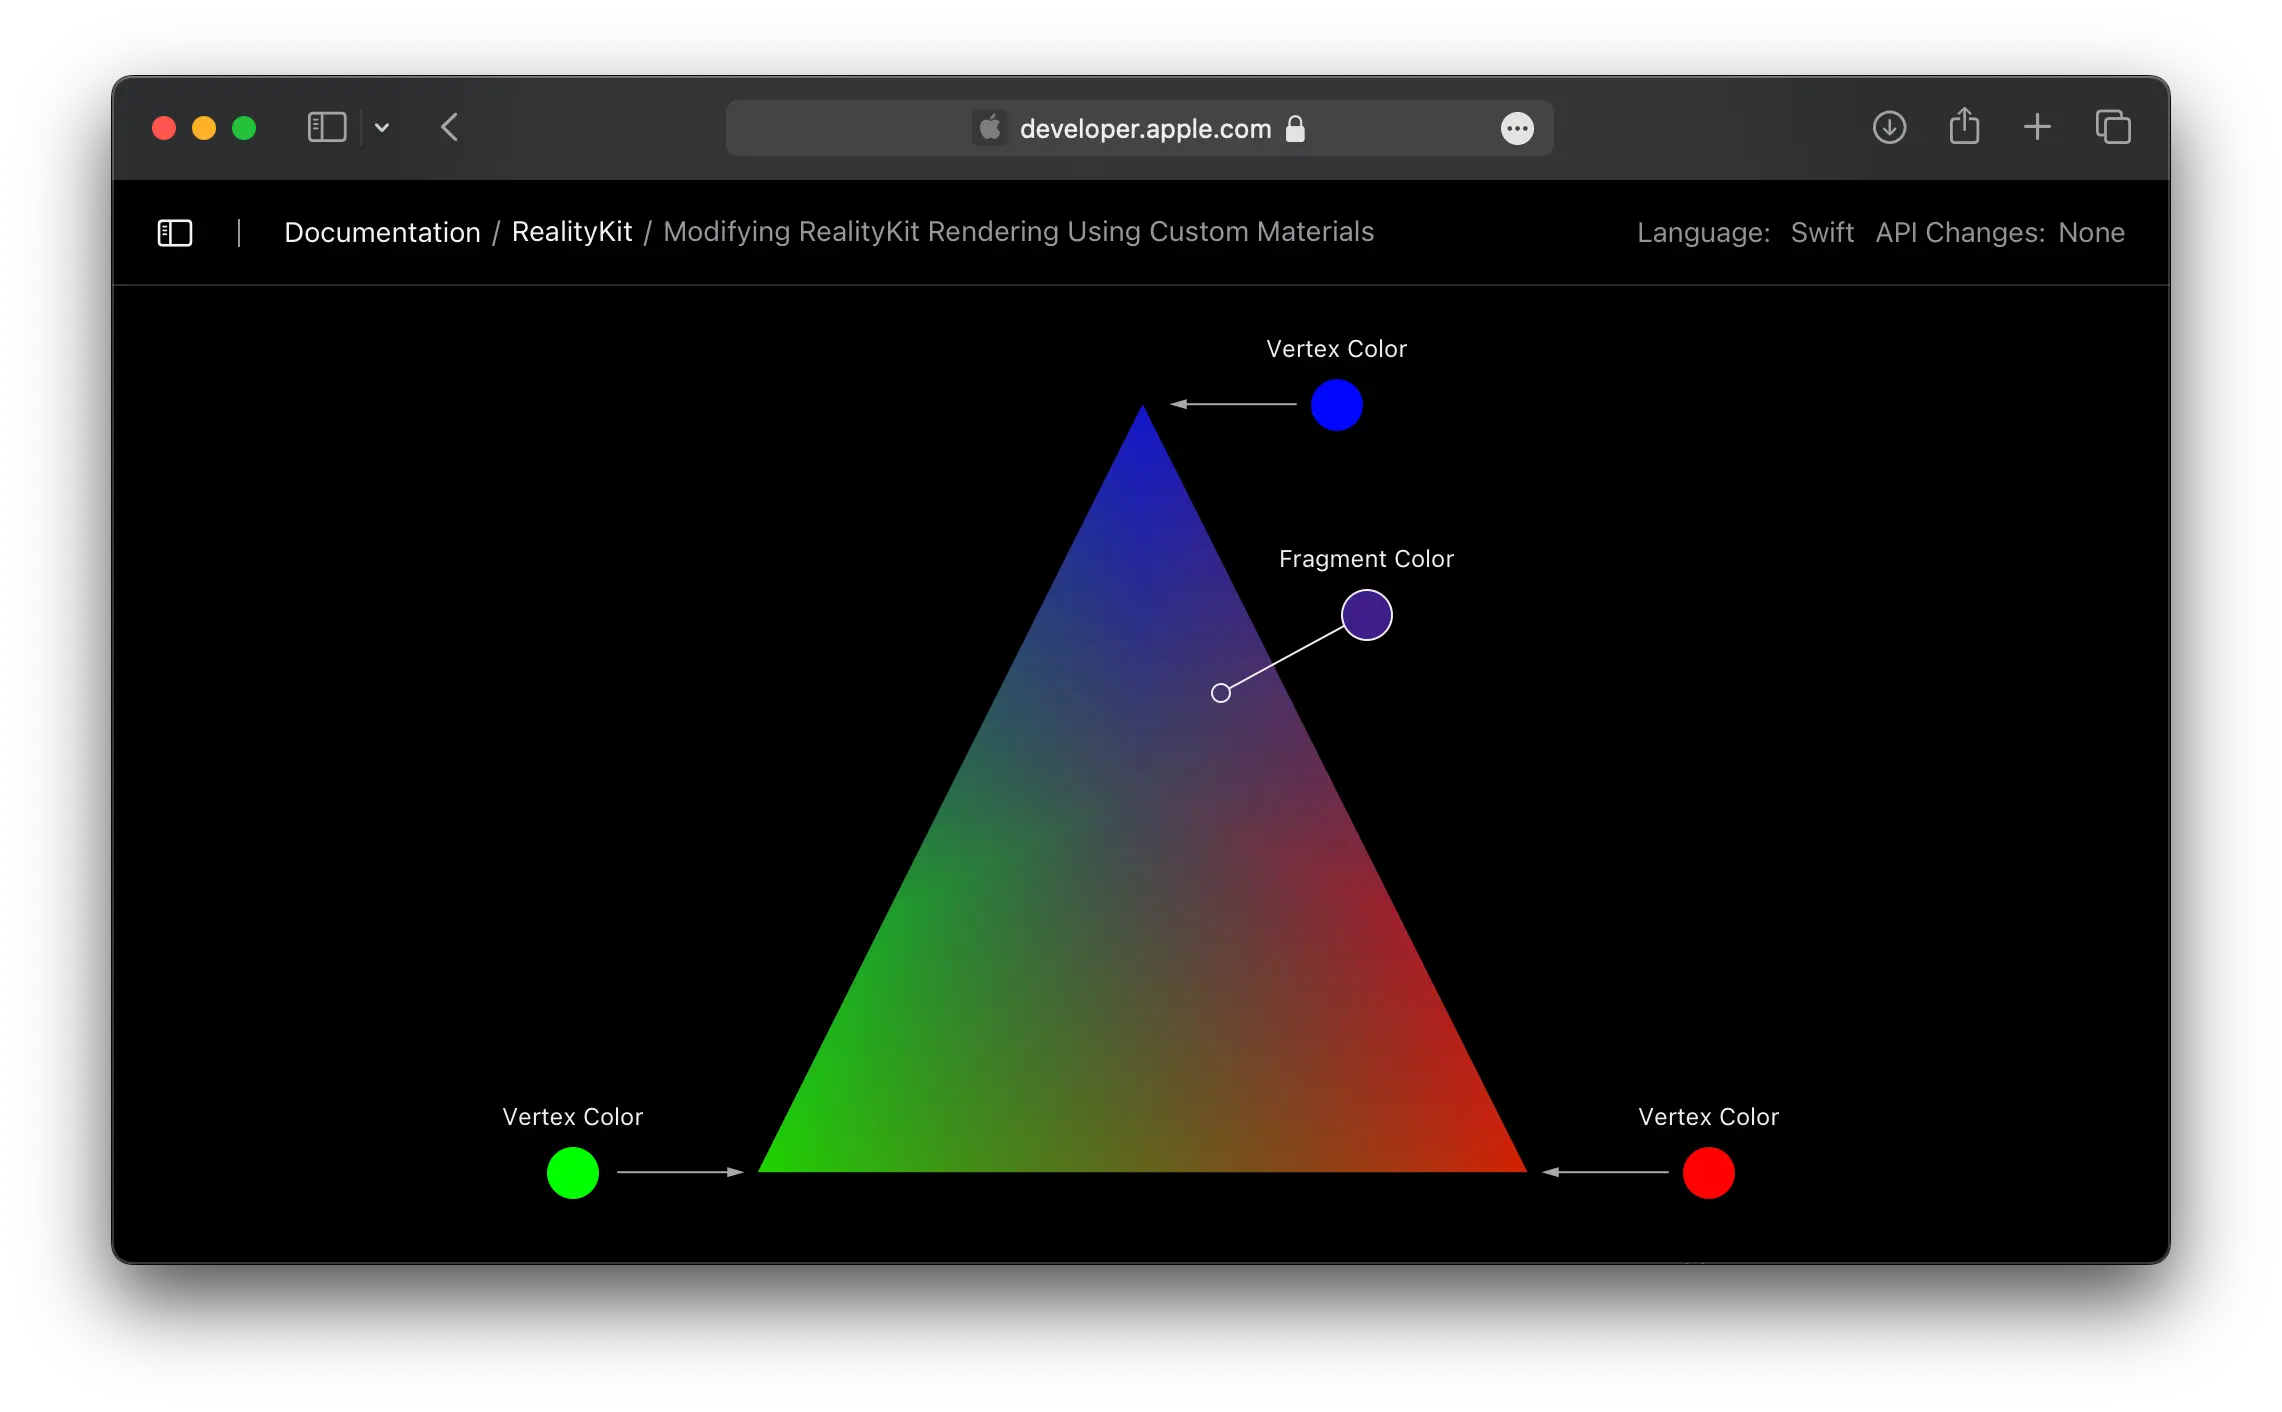
I prototyped a six-sided box with many vertices sprinkled throughout the geometry. I was then going to sample the color from a specific pixel in the camera frame, find the closest corresponding object vertex in my RealityKit scene, and paint that vertex with that sampled color. The documentation even has a useful diagram! In this case, each triangle vertex would be painted based on the underlying camera image.
If it's in the docs, it must be straightforward – right? ...right??
Try as I might, I wasn't able to assign different colors to different vertices using a Surface Shader. The issue is undoubtedly in my code, but knowing only that doesn't help when I'm trying to cobble something together.
Writing to SCNGeometry or a SceneKit Surface
I even considered falling back to my old friend, SceneKit. As I rooted around the web, I found an excellent GitHub repo by Junya Yoshida that explores various iOS computer vision concepts using the LiDAR sensor. More specifically, the Scan With Texture demo provides an interesting way to paint a texture using the camera image.
From a very high level, I ended up going with a similar concept – however I demurred from using SceneKit and SCNGeometry. I may have been able to use SceneKit by duct-taping together various bits from Apple sample code and ideas on Stack Overflow and elsewhere, but ultimately an SCNGeometry was a bad fit when all I really wanted was a box with six sides and unique textures on each side.
Next Steps for Minimap
Building the demo shown above was a lot of fun and, luckily, coming up next is...boring bug fixes that will probably take weeks.
If I make it past that: Let's try to expand on that whole real-time component of this concept.